.avif)
This easy-to-follow tutorial will guide you through extending the session timeout in Google Analytics 4 (GA4) to 7 hours 55 minutes and 60 seconds (almost 8 hours). By default, GA4 considers a user inactive after 30 minutes of inactivity, potentially leading to data loss. Extending the session timeout captures user behavior over a longer period, providing a more accurate picture of site engagement.
Why Extend the Session Timeout?
There are several reasons why you might want to extend the session timeout in GA4:
- Users who take longer browsing sessions: Some users might spend more than 30 minutes reading in-depth articles, watching videos, or researching products. Extending the timeout ensures you capture their entire journey.
- Users who switch between devices: People often browse websites on different devices (phones, computers, tablets). A longer timeout allows GA4 to connect these sessions and provide a more holistic view of user behavior.
- E-commerce transactions: The checkout process can sometimes take longer than 30 minutes, especially for complex purchases. Extending the timeout ensures you capture the entire transaction journey.
Extending the Session Timeout in GA4 (Step-by-Step with Images)
Here's a simple guide on how to extend the session timeout in GA4:
Step 1: Access Admin Settings
1. Log in to your Google Analytics account and select the desired GA4 property.
2. Click on the gear icon in the bottom left corner to access the "Admin" settings.
.png)
Step 2: Navigate to Data Streams
1. In the left-hand menu under the "Data collection and modification" column, click on "Data Streams".
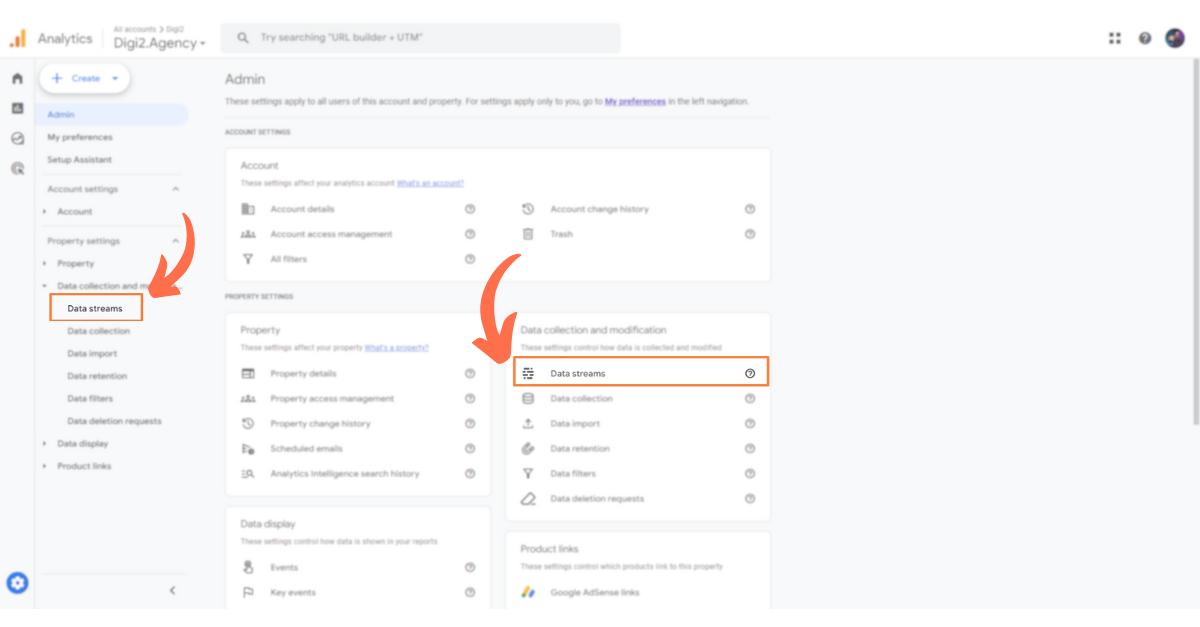
Step 3: Select Your Data Stream
1. You'll see a list of your data streams. Click on the data stream for which you want to adjust the session timeout.
.png)
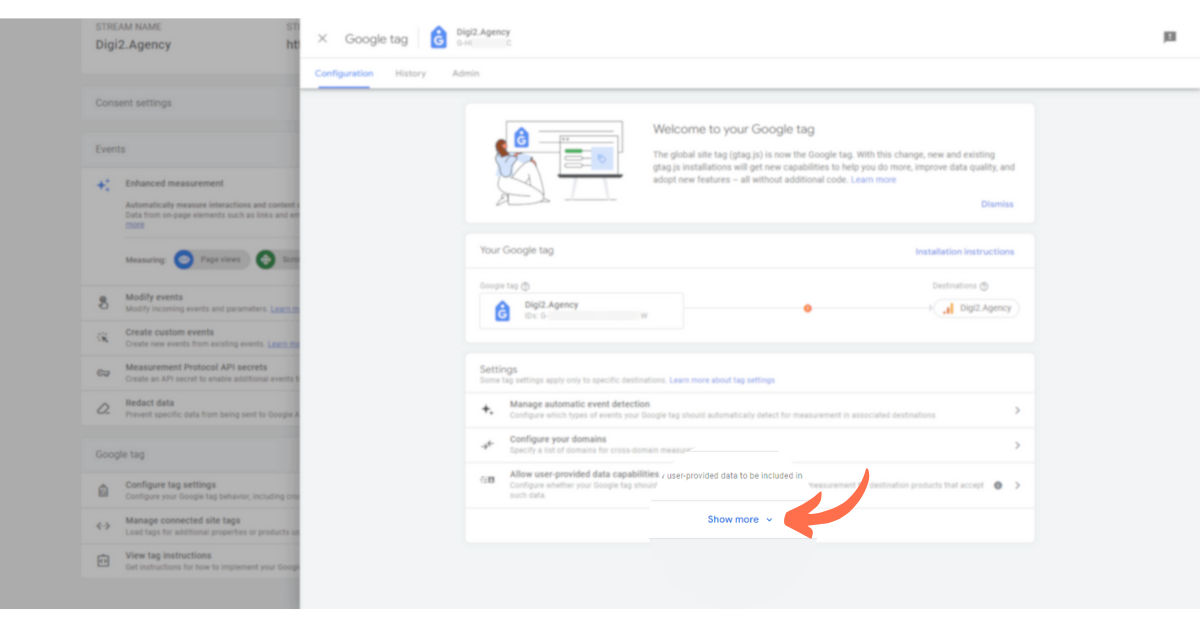
Step 4: Configure Tag Settings
1. Scroll down the data stream details page and locate the section titled "Configure Tag Settings" under the Google tag menu.
2. Click on "Configure Tag Settings" to expand the options.
.png)
Step 5: Adjust Session Timeout
1. Look for the section titled "Adjust session timeout".
2. Click on it to change the default timeout settings.
.png)
3. You can now adjust the session timeout in hours, minutes, and seconds. The maximum allowed timeout is 7 hours, 55 minutes and 60 seconds.
.png)
4. Once you've entered your desired timeout, click "Save" to apply the changes.
.png)
Congratulations! You've successfully extended the session timeout in your GA4 data stream. This will allow you to capture a more complete picture of user behavior on your website.
Additional Tips:
- While extending the timeout can be beneficial, it's important to find a balance. A very long timeout might lead to inaccurate data if users visit your site sporadically over a long period.
- Regularly monitor your GA4 reports to see if the new timeout provides a better representation of user behavior for your website.


